So this past weekend I was up at Anime Odyssey in San Antonio and I had a photography booth set up where they could choose their own background. Now I did not use a green screen because one it is too much hassle and two it takes more lights than I personally have to light it correctly, and three spillage, where the green reflects up on the subject. So instead of greenscreen I used white and photoshop.
The biggest challenge I faced was just the fact that I wasn't able to steam my backdrop so there were creases in it but other than that it was pretty easy to pull them out of the image.
The first step was obviously setting up my lighting, I used my cowboy studio remote flash system, and umbrella setup from Polaroid which I cant remember off the top of my head how much I paid but it wasn't much and it worked quite well. My flashes were set on manual at 1/8 power, my camera was set on shutter 1/250, f-stop was around 13 and my ISO was at 250. The lights were on either side of me a little higher than my head. Also the umbrellas are actually a key part of the setup it is near impossible to set up without the umbrellas or possibly a soft box if you are shooting with speed lights like I was. I went for a more even lighting for each image because it would make it easier to make them work in the backgrounds because I could manipulate the lighting in phoptoshop.
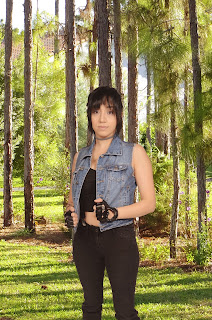
Next was the photoshop work itself, I let them pose themselves because I am not an expert on each character that they were dressed in so I didn't want to pose them in the wrong pose :/ so I took 3 poses and exported them straight to my computer as I was shooting so they could see the picture and make sure they weren't making a derpy face.
So once I finished with them I got to work in photoshop. What I use is the quick selection tool in photoshop and select them making sure anything with white is not in the selection. Next I go into refine edge witch is in the upper part of the screen usually about center. Once in there I will usually change the view mode to On Black so I can see if there is a white halo around them and usually there is. Next I check the smart radius option and change the radius to around 2.1, next I change the smoothness this mostly depends on if your subject has more curves or more harsh edges but I usually don't go over 15, next is the feathering that I dont go over 3 because it makes the edges too soft, contrast is usually around 6, and I shift my edge to around -7 this usually gets rid of the white halo, you can shift it in further if you need this is based on what you think looks good but usually -7 is where I put it.
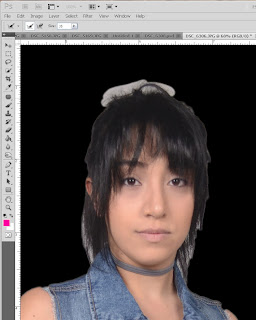
The next part is a bit more complicated because sometimes it works for me and sometimes it doesn't but you will click the little brush on in the screen so that when you mouse over the image it have a circle with a + in it. You will use this to paint the edges like hair and such. When you click and drag like you are painting it will start to look like this then once you let go it will think and it will add in the hair and take out the white.
Once you are done doing the edges I recommend outputting it to a new layer with a layer mask because with the layer mask you will be able to add anything that you might have accidentally missed.
Once you finish and hit OK it will look like this:
From here you make make any other edits by using the layer mask which is the black and white image that is right next to the preview of the image that you are on in the layer mask. To get to this you just click on the black and white part and you are now working in the layer mask. With this you will use your paint brush and white will add to it and black will take away so if you accidentally missed selecting a part of the shirt or something then you just add it here. Once you are satisfied then you can drop in a background.
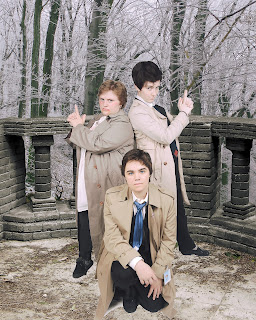
Once you ad a background you are going to want to add a layer of a filter so that your subject and the background are the same hue so if its outside you will want the subject to match the warmth of the image or if its inside you will want it to match the lightness or darkness of the background image. I have a couple actions on my computer that I used to make this possible and easier. This part it the hardest to make it seem like it is part of the background, if you already know what the background is going to be the lighting can help but since everyone chose the background they wanted it would vary so it was easier for me to shoot it with even lighting and fix it up in photoshop. All together it took about 10-15 minutes per image to edit them.
Hope you enjoyed this little tutorial if you have any questions feel free to ask me here or on my facebook:
https://www.facebook.com/sixtysixphotography


