Ok so my eye has been twitching for the past 4 days now and I am about ready to gouge it out so needless to say I really don't have the patience to actually write out a whole blog post because I have a feeling I might just self assassinate... so instead I have decided to share some of my favorite pics with you from all sorts of time periods, some recent and have been posted some I haven't posted but might if I need another filler day. I will probably write a little bit about each pic but not go into detail of how i achieved it more or less just when it was done so I will try to put them in order of when I took them... So without further ado:


So these three pictures were one of the first pics that I took that kind of made me realize how much I liked photography and that was what I wanted to do with my life. Now these three pics were definitely by no means great, of course young aspiring me thought they were pretty damn good but looking back there are so many things I could change which sadly I cant do because two of these pics I don't have the original files anymore because I have a love hate relation ship with desktops and I never used to back up my stuff onto a separate drive. Can you blame me? I was in high school when this happened. Now I back everything up, twice... So if you take anything out of this trip down memory lane please learn to back up everything!


Next in line is this gorgeous baby, this was taken in my digital photography class on our first photo shoot outing. This was my first time handling my very own DSLR which was my Nikon D5000 which I still have. I was not yet shooting in manual because I was still learning but this picture is by far my best accomplishment from that class. Sometimes I honestly cant believe that I took this pic...

So after that sometime during Christmas of course right now i cant remember which Christmas but I was up in El Paso for Christmas and it snowed! So of course I whipped out my D5000 and ran outside without gloves on and froze my pretty little fingers off but out if it i got some amazing pictures of snow that rarely ever happens in south Texas and usually happens in El Paso after we leave. By this time I knew how to shoot manual and everything here on out was shot in manual.

Next up was night time photography, my co-worker at the time had gotten me interested in night time photos and so he took me where he liked to shoot and I came up with this baby!.

The next time we went out we trekked up the Harbor Bridge and did some amazing pictures from up there and soon we are going back for fourth of July to take pics of the fireworks!


So these pictures were taken for one of my friends moms boyfriend, thats a mouthful... He was making a CD and these were some detail shots from the session which I love and honestly have no use for but to post them here maybe one day I will have to use these in a class or something.

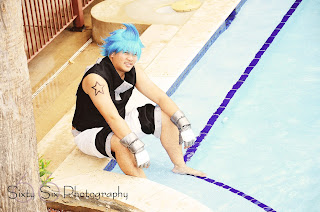
This picture was taken at a convention back in November and i just love everything about this picture, the lighting the pool, the convention gave us lots of down time and if we ever film the rest of the video I will post that even though it wasn't photography.
Next up was the water pictures which is the first ever blog post that I posted. There were so many from this shoot that I loved and the entire experience was fun too!
Last but not least this picture! This pic is probably one of my favorites by far, the lighting I'm in love with, the shadows, the pose, the everything... I know there are probably things I could change but this picture but I wouldn't just saying.
So I hope you had fun taking a trip with me down memory lane, I know I had some fun because I was unearthing things I completely forgot about... So hopefully my eye stops twitching and I might get to post up something else. Today was originally gonna be a post about graduation since one of my friends graduated this past weekend but I forgot the memory card at home thanks the the ever annoying twitch in my eye...
 First you will want the table so you aren’t working on the ground
so if need be you can get a ground angle. Then you can either cover it with
cloth or paper, I used a fluffy blanket because I can. Then for the back ground
white butcher paper taped to your wall is fine. You will want to make sure
there is room between the paper and the table so your flashes don’t over light
your subject. Finally for the lights you are going to want 3-4 flashes to
achieve the solid white you are wanting plus light up the product.


