So I've been on this crazy long hiatus from you all because of life and all that jazz. I want to update you that I am still alive I have just been going through some crazy stuff, I have lost a friend (not dead just not really friends anymore), had a ton of stuff stolen from my car (which included my external hard drive so most of my pictures are all gone) and most recently I had a flat tire which hey isn't all bad but one on top of another on top of another is all fun right?
So I am not here to bore you on the woefulness that is my life but I as I make my way through all of this am thinking of starting up a separate blog about how my life could be a c list movie. I do plan on updating as soon as I have more free time but I know for sure there will be an update immediately following new years and hopefully one just before.
The one just before new years will be about how to shoot fireworks, all of those pictures should have been posted on my facebook so I should be able to go back and get those for that post, if not then I am a bit SOL because it really isn't firework season so lets hope I have them on my facebook :/
The one after new years will be of my trip to New York! I am super lucky to have this chance to go up to New York for new years, I have an amazing friend who is letting stay at his place so I don't have to pay for a hotel. I will be up there a week so I expect to have a couple different blog posts separating all of my pictures.
I am now in the midst of finals and getting crap done for my stupid art class and hopefully I will be able to have a post up in about two weeks(hopefully sooner if my life lets me do what I want) with a couple pictures I took over the Thanksgiving Holiday.
Now I don't want to just throw a bunch of words at you and not give you any pictures so here are some pics I have either previously posted the shoot and didn't share or I just hadnt had a chance to share it just yet.
This picture was from my Night Time Photography blog post. This was a little pencil pouch I used to carry arround so we have a bit of fun up on the bridge.
This shot is from the Photoshoot with off camera lighting blog post. I have a TON of pictures from this shoot that were just down right amazing, most of which are posted on my facebook page if you would like to check them out.
This one is an extra from the Better then spoiled milk blog post. Yet again I have a ton of these but I havent gotten around to editing most of them! Hopefully there will be more of these up on my facebook page in the future.
This picture or rather composite is from a photoshoot I did almost a year ago. This is one of my very good friends and we were doing promo pics for the cosplay group she runs and I created this little beauty for her.
This is a blog for me to share with the world what I love to do and how I do it. I in no way think that I know everything about photography, I know there is lots for me to learn but I would love to help those with what I do know.
Showing posts with label cosplay. Show all posts
Wednesday, December 4, 2013
Life is kind of a living hell right now...
Labels:
anime,
camera,
cosplay,
D7000,
final fantasy,
flash,
light streaks,
lights,
milk,
model,
night time,
nikon,
off camera flash,
outdoor photography,
Photography,
photoshoot,
photoshop,
Pictures,
Tifa,
water
Wednesday, July 17, 2013
Backdrop it like its hot!
![]() |
| Navi annoying Link like always. |
![]() |
| Navi being ignored like always :( |
All of these have already been posted on my facebook but there will be more so keep an eye out!
![]() |
| The Mad Hatter |
![]() |
| Happy bat family? probably not... |
![]() |
| Cat woman can steal me any day! |
Labels:
anime,
camera,
cosplay,
D7000,
flash,
lens,
sb700,
sb910,
set up,
vinyl backdrop,
wireless trigger
Wednesday, June 12, 2013
Some Favs
Ok so my eye has been twitching for the past 4 days now and I am about ready to gouge it out so needless to say I really don't have the patience to actually write out a whole blog post because I have a feeling I might just self assassinate... so instead I have decided to share some of my favorite pics with you from all sorts of time periods, some recent and have been posted some I haven't posted but might if I need another filler day. I will probably write a little bit about each pic but not go into detail of how i achieved it more or less just when it was done so I will try to put them in order of when I took them... So without further ado:
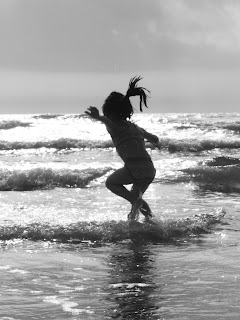
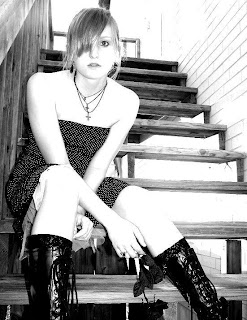
So these three pictures were one of the first pics that I took that kind of made me realize how much I liked photography and that was what I wanted to do with my life. Now these three pics were definitely by no means great, of course young aspiring me thought they were pretty damn good but looking back there are so many things I could change which sadly I cant do because two of these pics I don't have the original files anymore because I have a love hate relation ship with desktops and I never used to back up my stuff onto a separate drive. Can you blame me? I was in high school when this happened. Now I back everything up, twice... So if you take anything out of this trip down memory lane please learn to back up everything!
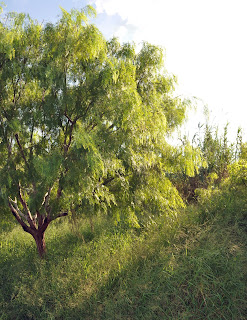
Next in line is this gorgeous baby, this was taken in my digital photography class on our first photo shoot outing. This was my first time handling my very own DSLR which was my Nikon D5000 which I still have. I was not yet shooting in manual because I was still learning but this picture is by far my best accomplishment from that class. Sometimes I honestly cant believe that I took this pic...
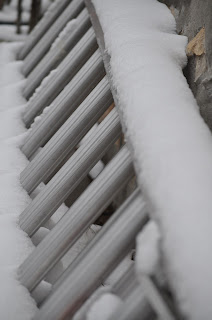
So after that sometime during Christmas of course right now i cant remember which Christmas but I was up in El Paso for Christmas and it snowed! So of course I whipped out my D5000 and ran outside without gloves on and froze my pretty little fingers off but out if it i got some amazing pictures of snow that rarely ever happens in south Texas and usually happens in El Paso after we leave. By this time I knew how to shoot manual and everything here on out was shot in manual.
Next up was night time photography, my co-worker at the time had gotten me interested in night time photos and so he took me where he liked to shoot and I came up with this baby!.
The next time we went out we trekked up the Harbor Bridge and did some amazing pictures from up there and soon we are going back for fourth of July to take pics of the fireworks!


So these pictures were taken for one of my friends moms boyfriend, thats a mouthful... He was making a CD and these were some detail shots from the session which I love and honestly have no use for but to post them here maybe one day I will have to use these in a class or something.
This picture was taken at a convention back in November and i just love everything about this picture, the lighting the pool, the convention gave us lots of down time and if we ever film the rest of the video I will post that even though it wasn't photography.
Next up was the water pictures which is the first ever blog post that I posted. There were so many from this shoot that I loved and the entire experience was fun too!


So these three pictures were one of the first pics that I took that kind of made me realize how much I liked photography and that was what I wanted to do with my life. Now these three pics were definitely by no means great, of course young aspiring me thought they were pretty damn good but looking back there are so many things I could change which sadly I cant do because two of these pics I don't have the original files anymore because I have a love hate relation ship with desktops and I never used to back up my stuff onto a separate drive. Can you blame me? I was in high school when this happened. Now I back everything up, twice... So if you take anything out of this trip down memory lane please learn to back up everything!
Next in line is this gorgeous baby, this was taken in my digital photography class on our first photo shoot outing. This was my first time handling my very own DSLR which was my Nikon D5000 which I still have. I was not yet shooting in manual because I was still learning but this picture is by far my best accomplishment from that class. Sometimes I honestly cant believe that I took this pic...
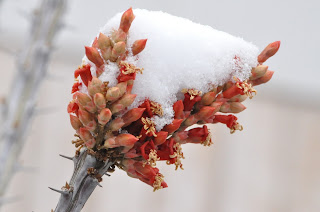
Next up was night time photography, my co-worker at the time had gotten me interested in night time photos and so he took me where he liked to shoot and I came up with this baby!.
The next time we went out we trekked up the Harbor Bridge and did some amazing pictures from up there and soon we are going back for fourth of July to take pics of the fireworks!So these pictures were taken for one of my friends moms boyfriend, thats a mouthful... He was making a CD and these were some detail shots from the session which I love and honestly have no use for but to post them here maybe one day I will have to use these in a class or something.
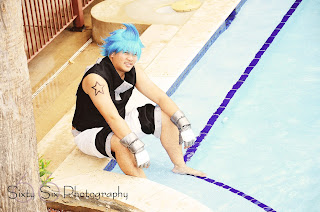
This picture was taken at a convention back in November and i just love everything about this picture, the lighting the pool, the convention gave us lots of down time and if we ever film the rest of the video I will post that even though it wasn't photography.Next up was the water pictures which is the first ever blog post that I posted. There were so many from this shoot that I loved and the entire experience was fun too!
Last but not least this picture! This pic is probably one of my favorites by far, the lighting I'm in love with, the shadows, the pose, the everything... I know there are probably things I could change but this picture but I wouldn't just saying.
So I hope you had fun taking a trip with me down memory lane, I know I had some fun because I was unearthing things I completely forgot about... So hopefully my eye stops twitching and I might get to post up something else. Today was originally gonna be a post about graduation since one of my friends graduated this past weekend but I forgot the memory card at home thanks the the ever annoying twitch in my eye...
Wednesday, May 29, 2013
Greenscreen? I think not! Its just magic...
So this past weekend I was up at Anime Odyssey in San Antonio and I had a photography booth set up where they could choose their own background. Now I did not use a green screen because one it is too much hassle and two it takes more lights than I personally have to light it correctly, and three spillage, where the green reflects up on the subject. So instead of greenscreen I used white and photoshop.
The biggest challenge I faced was just the fact that I wasn't able to steam my backdrop so there were creases in it but other than that it was pretty easy to pull them out of the image.
The first step was obviously setting up my lighting, I used my cowboy studio remote flash system, and umbrella setup from Polaroid which I cant remember off the top of my head how much I paid but it wasn't much and it worked quite well. My flashes were set on manual at 1/8 power, my camera was set on shutter 1/250, f-stop was around 13 and my ISO was at 250. The lights were on either side of me a little higher than my head. Also the umbrellas are actually a key part of the setup it is near impossible to set up without the umbrellas or possibly a soft box if you are shooting with speed lights like I was. I went for a more even lighting for each image because it would make it easier to make them work in the backgrounds because I could manipulate the lighting in phoptoshop.
Next was the photoshop work itself, I let them pose themselves because I am not an expert on each character that they were dressed in so I didn't want to pose them in the wrong pose :/ so I took 3 poses and exported them straight to my computer as I was shooting so they could see the picture and make sure they weren't making a derpy face.
So once I finished with them I got to work in photoshop. What I use is the quick selection tool in photoshop and select them making sure anything with white is not in the selection. Next I go into refine edge witch is in the upper part of the screen usually about center. Once in there I will usually change the view mode to On Black so I can see if there is a white halo around them and usually there is. Next I check the smart radius option and change the radius to around 2.1, next I change the smoothness this mostly depends on if your subject has more curves or more harsh edges but I usually don't go over 15, next is the feathering that I dont go over 3 because it makes the edges too soft, contrast is usually around 6, and I shift my edge to around -7 this usually gets rid of the white halo, you can shift it in further if you need this is based on what you think looks good but usually -7 is where I put it.

The next part is a bit more complicated because sometimes it works for me and sometimes it doesn't but you will click the little brush on in the screen so that when you mouse over the image it have a circle with a + in it. You will use this to paint the edges like hair and such. When you click and drag like you are painting it will start to look like this then once you let go it will think and it will add in the hair and take out the white.
Once you are done doing the edges I recommend outputting it to a new layer with a layer mask because with the layer mask you will be able to add anything that you might have accidentally missed.
Once you finish and hit OK it will look like this:
From here you make make any other edits by using the layer mask which is the black and white image that is right next to the preview of the image that you are on in the layer mask. To get to this you just click on the black and white part and you are now working in the layer mask. With this you will use your paint brush and white will add to it and black will take away so if you accidentally missed selecting a part of the shirt or something then you just add it here. Once you are satisfied then you can drop in a background.
Once you ad a background you are going to want to add a layer of a filter so that your subject and the background are the same hue so if its outside you will want the subject to match the warmth of the image or if its inside you will want it to match the lightness or darkness of the background image. I have a couple actions on my computer that I used to make this possible and easier. This part it the hardest to make it seem like it is part of the background, if you already know what the background is going to be the lighting can help but since everyone chose the background they wanted it would vary so it was easier for me to shoot it with even lighting and fix it up in photoshop. All together it took about 10-15 minutes per image to edit them.
Hope you enjoyed this little tutorial if you have any questions feel free to ask me here or on my facebook: https://www.facebook.com/sixtysixphotography
The biggest challenge I faced was just the fact that I wasn't able to steam my backdrop so there were creases in it but other than that it was pretty easy to pull them out of the image.
The first step was obviously setting up my lighting, I used my cowboy studio remote flash system, and umbrella setup from Polaroid which I cant remember off the top of my head how much I paid but it wasn't much and it worked quite well. My flashes were set on manual at 1/8 power, my camera was set on shutter 1/250, f-stop was around 13 and my ISO was at 250. The lights were on either side of me a little higher than my head. Also the umbrellas are actually a key part of the setup it is near impossible to set up without the umbrellas or possibly a soft box if you are shooting with speed lights like I was. I went for a more even lighting for each image because it would make it easier to make them work in the backgrounds because I could manipulate the lighting in phoptoshop.
Next was the photoshop work itself, I let them pose themselves because I am not an expert on each character that they were dressed in so I didn't want to pose them in the wrong pose :/ so I took 3 poses and exported them straight to my computer as I was shooting so they could see the picture and make sure they weren't making a derpy face.So once I finished with them I got to work in photoshop. What I use is the quick selection tool in photoshop and select them making sure anything with white is not in the selection. Next I go into refine edge witch is in the upper part of the screen usually about center. Once in there I will usually change the view mode to On Black so I can see if there is a white halo around them and usually there is. Next I check the smart radius option and change the radius to around 2.1, next I change the smoothness this mostly depends on if your subject has more curves or more harsh edges but I usually don't go over 15, next is the feathering that I dont go over 3 because it makes the edges too soft, contrast is usually around 6, and I shift my edge to around -7 this usually gets rid of the white halo, you can shift it in further if you need this is based on what you think looks good but usually -7 is where I put it.

The next part is a bit more complicated because sometimes it works for me and sometimes it doesn't but you will click the little brush on in the screen so that when you mouse over the image it have a circle with a + in it. You will use this to paint the edges like hair and such. When you click and drag like you are painting it will start to look like this then once you let go it will think and it will add in the hair and take out the white.
Once you are done doing the edges I recommend outputting it to a new layer with a layer mask because with the layer mask you will be able to add anything that you might have accidentally missed.
Once you finish and hit OK it will look like this:
From here you make make any other edits by using the layer mask which is the black and white image that is right next to the preview of the image that you are on in the layer mask. To get to this you just click on the black and white part and you are now working in the layer mask. With this you will use your paint brush and white will add to it and black will take away so if you accidentally missed selecting a part of the shirt or something then you just add it here. Once you are satisfied then you can drop in a background.
Once you ad a background you are going to want to add a layer of a filter so that your subject and the background are the same hue so if its outside you will want the subject to match the warmth of the image or if its inside you will want it to match the lightness or darkness of the background image. I have a couple actions on my computer that I used to make this possible and easier. This part it the hardest to make it seem like it is part of the background, if you already know what the background is going to be the lighting can help but since everyone chose the background they wanted it would vary so it was easier for me to shoot it with even lighting and fix it up in photoshop. All together it took about 10-15 minutes per image to edit them.Hope you enjoyed this little tutorial if you have any questions feel free to ask me here or on my facebook: https://www.facebook.com/sixtysixphotography
Labels:
anime,
cosplay,
Cowboystudio NPT-04,
fairy tail,
final fantasy,
flash,
greenscreen,
how to,
how to set up,
lights,
off camera flash,
Photography,
photoshop,
Pictures,
sb910,
Supernatural,
wireless trigger
Wednesday, March 27, 2013
Photoshoot at a Convention
Ok for this blog post I'm going back into my files and pulling out another old photoshoot. This one was done at a convention in Weslaco at an anime convention. Usually at anime conventions there are quite a few places to shoot and for us we had this beautiful pool area to shoot with.
For this shoot my camera settings stayed pretty much the same the entire time because it was cloudy and the lighting never really changed! Which basically never happens lol! So for my settings I had my shutter at 1/200, my ISO at 200, and my f-stop ranged between f5.6 and f7.1 because of the zoom on the camera.

One of the fun things about this shoot was working with cosplayers, for those who don't know the characters the one with the blue hair is Black Star and the one with the purple hair is Blair. Now Black Star is a friend of mine and we were planning on doing a shoot anyway but Blair we had just met that day and kinda just grabbed her for a video we were shooting and used her in the photoshoot. She was a great sport, and I loved her shoes!
So the big difference working with coplayers is that you or they need to know how the character acts to do the shoot. If you shoot them out of character more than likely you will get a bit of flack from that. So I was lucky enough that both my models knew exactly what they were doing!
So all I had to worry about was setting up the shot like where I wanted them and where I was. For most of the shots I was across the pool from them with one of my zoom lenses on. I believe for most of this shoot I worked with my 55-200 lens. For this shot I went up on the stairs going up to the second floor so I could get a higher angle.
Where you are in a photoshoot I feel is key because you control where you want the viewing to be looking from and what you want the viewer to see. The first picture was also shot from the same area just a little higher on the stairs.
Also play with your angles a bit don't just shoot the same angle every shot, change it up a bit don't be afraid to test things out. Not all of your shots will be useable but thats ok you need to know what works and what doesn't.
The only thing I did in photoshop for this shoot was add a warmer effect because I wanted it to seem more like a sunny day since the sun wasn't out.
I know this post is a bit short but I wanted to share this shoot with you because it was one of my favorites.
For this shoot my camera settings stayed pretty much the same the entire time because it was cloudy and the lighting never really changed! Which basically never happens lol! So for my settings I had my shutter at 1/200, my ISO at 200, and my f-stop ranged between f5.6 and f7.1 because of the zoom on the camera.

One of the fun things about this shoot was working with cosplayers, for those who don't know the characters the one with the blue hair is Black Star and the one with the purple hair is Blair. Now Black Star is a friend of mine and we were planning on doing a shoot anyway but Blair we had just met that day and kinda just grabbed her for a video we were shooting and used her in the photoshoot. She was a great sport, and I loved her shoes!
So the big difference working with coplayers is that you or they need to know how the character acts to do the shoot. If you shoot them out of character more than likely you will get a bit of flack from that. So I was lucky enough that both my models knew exactly what they were doing!
So all I had to worry about was setting up the shot like where I wanted them and where I was. For most of the shots I was across the pool from them with one of my zoom lenses on. I believe for most of this shoot I worked with my 55-200 lens. For this shot I went up on the stairs going up to the second floor so I could get a higher angle.
Where you are in a photoshoot I feel is key because you control where you want the viewing to be looking from and what you want the viewer to see. The first picture was also shot from the same area just a little higher on the stairs.
Also play with your angles a bit don't just shoot the same angle every shot, change it up a bit don't be afraid to test things out. Not all of your shots will be useable but thats ok you need to know what works and what doesn't.
The only thing I did in photoshop for this shoot was add a warmer effect because I wanted it to seem more like a sunny day since the sun wasn't out.
I know this post is a bit short but I wanted to share this shoot with you because it was one of my favorites.
Wednesday, March 6, 2013
Photoshoot with off camera lighting!
Ok so for today's post I will be talking about my shoot with one of my friends last Sunday! This was a fun shoot to do and also very dirty! For most of these images I used off camera lighting and for some I didn't use any at all so everything was natural lighting.
For this shoot I used:
- Nikon D7000
-SB 910
-SB 700
-CowboyStudio NPT-04 (Wireless trigger for my flashes)
On a side note you will now notice a logo on the images, I now have my own facebook like page :D so feel free to go like it: www.facebook.com/sixtysixphotography
For this image my camera settings were at ISO 400, F-stop 5.0 and Shutter 1/250. As for the lighting setup I Put one flash on the ground at about a 30 degree angle shooting at the wall behind her to illuminate that and another flash at the same angle further down to illuminate her and the wall between me and her. Both of the flashes were set at a 1/8 of power so that it didn't overpower the subject. The f-stop is what gives us the depth of field where the wall closest to us is blurry and the subject is in focus.
For this image the camera settings were ISO 320, f-stop 4.5 and the shutter at 1/250. The lighting setup for this was one flash to the left of me on the ground at about a 25-30 degree angle. The flash was on full power and a little further away from the image above so it didn't over power anything. What I was playing with in this image was the shadows so I had the subject step up about 4-5 steps from the wall so that the wall got pretty much all of the subjects shadow on the wall to basically replicate her pose.
This image was fun to shoot because I was on the other side of the building shooting so I couldn't control much. The camera settings were ISO 250, f-stop 5.6 and shutter 1/200. I used a flash on the floor behind her to light up the background, the flash was on full power pointing straight up to the ceiling (it was a pretty tall ceiling).
I honestly had so many from this shoot that I love and all had different setups so i will try to only do 2 more. For this image I used ISO 320, f-stop 5.6 and shutter 1/200, very similar to the last image. For the last image I had some ambient lighting to work with but not too much since the sun was on the other side of the building. For this image I had more ambient light but I didn't have it where I wanted it so i used both my flashes on full power at about a 30 degree angle pointed towards her to light up the room. I used the lower f-stop to create the depth of field where the flowers are in focus and she is blurry in the background.
For the last image I will talk about is this one, i did not use any flash because she was literally 1.5 floors above me on the opposite side of the building so I was working with ambient light the whole way. The camera settings were ISO 250, f-stop 13.0 and shutter 1/250. The sun was coming in straight on her face so I had to adjust for that which is why I make the f-stop higher since I wasn't doing any depth of field work.
So if you liked these images you should check out my facebook page I have more pictures from this shoot! (dont forget to like the page too!)
For this shoot I used:
- Nikon D7000
-SB 910
-SB 700
-CowboyStudio NPT-04 (Wireless trigger for my flashes)
On a side note you will now notice a logo on the images, I now have my own facebook like page :D so feel free to go like it: www.facebook.com/sixtysixphotography
For this image my camera settings were at ISO 400, F-stop 5.0 and Shutter 1/250. As for the lighting setup I Put one flash on the ground at about a 30 degree angle shooting at the wall behind her to illuminate that and another flash at the same angle further down to illuminate her and the wall between me and her. Both of the flashes were set at a 1/8 of power so that it didn't overpower the subject. The f-stop is what gives us the depth of field where the wall closest to us is blurry and the subject is in focus.
For this image the camera settings were ISO 320, f-stop 4.5 and the shutter at 1/250. The lighting setup for this was one flash to the left of me on the ground at about a 25-30 degree angle. The flash was on full power and a little further away from the image above so it didn't over power anything. What I was playing with in this image was the shadows so I had the subject step up about 4-5 steps from the wall so that the wall got pretty much all of the subjects shadow on the wall to basically replicate her pose.
This image was fun to shoot because I was on the other side of the building shooting so I couldn't control much. The camera settings were ISO 250, f-stop 5.6 and shutter 1/200. I used a flash on the floor behind her to light up the background, the flash was on full power pointing straight up to the ceiling (it was a pretty tall ceiling).
I honestly had so many from this shoot that I love and all had different setups so i will try to only do 2 more. For this image I used ISO 320, f-stop 5.6 and shutter 1/200, very similar to the last image. For the last image I had some ambient lighting to work with but not too much since the sun was on the other side of the building. For this image I had more ambient light but I didn't have it where I wanted it so i used both my flashes on full power at about a 30 degree angle pointed towards her to light up the room. I used the lower f-stop to create the depth of field where the flowers are in focus and she is blurry in the background.
For the last image I will talk about is this one, i did not use any flash because she was literally 1.5 floors above me on the opposite side of the building so I was working with ambient light the whole way. The camera settings were ISO 250, f-stop 13.0 and shutter 1/250. The sun was coming in straight on her face so I had to adjust for that which is why I make the f-stop higher since I wasn't doing any depth of field work.
So if you liked these images you should check out my facebook page I have more pictures from this shoot! (dont forget to like the page too!)
Labels:
anime,
aperture,
cosplay,
Cowboystudio NPT-04,
D7000,
depth of field,
flash,
model,
nikon,
off camera flash,
outdoor photography,
Photography,
photoshoot,
sb700,
sb910,
set up,
Tifa,
wireless trigger
Subscribe to:
Posts (Atom)